Japanese
Garden Design Project
Garden Project Stage 3 - Brick
Planter
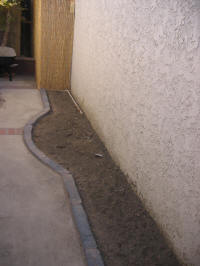
The garden planter is now clear of
rocks and debris and ready to add amendments to the soil and plants
to the area.. However, the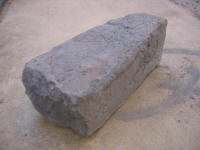
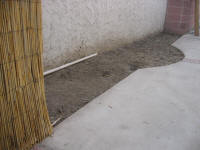 planter
space lacks dimension and style. I wanted to add a border of stone
or bricks, not only to give the area some style but to keep the dirt
and filler rocks in the planter as well. . I wanted an older looking
brick whish resembled stone, but was limited in my budget. I was
able to find concrete bricks which were a grey-blue color, which
look like older stone blocks. They looked great, but I found that
they were not very sturdy, and I broke a few when I was placing and
tapping them in place. Once they are in, and dirt filler behind to
keep them in place, they should be ok and stay in place. planter
space lacks dimension and style. I wanted to add a border of stone
or bricks, not only to give the area some style but to keep the dirt
and filler rocks in the planter as well. . I wanted an older looking
brick whish resembled stone, but was limited in my budget. I was
able to find concrete bricks which were a grey-blue color, which
look like older stone blocks. They looked great, but I found that
they were not very sturdy, and I broke a few when I was placing and
tapping them in place. Once they are in, and dirt filler behind to
keep them in place, they should be ok and stay in place.
To keep them in place, I dug a
shallow trench and placed 1/2 inch of sand in the bottom I
placed the bricks in and left approximately 1 1/2"
 of the brick
above the walkway. In order to keep them in place, I tapped then
down into the sand a bit. This of the brick
above the walkway. In order to keep them in place, I tapped then
down into the sand a bit. This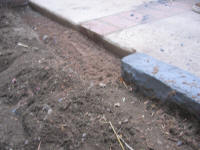 is where I ran into a few problems
with the bricks breaking. I decided that it was not a big problem,
as the variations in the sizes actually gave the brick border a nice
aged look. My goal is to create a Japanese garden which looks
somewhat aged and established. Therefore, the slight imperfections
in the materials is exactly what I want in creating the garden
space. is where I ran into a few problems
with the bricks breaking. I decided that it was not a big problem,
as the variations in the sizes actually gave the brick border a nice
aged look. My goal is to create a Japanese garden which looks
somewhat aged and established. Therefore, the slight imperfections
in the materials is exactly what I want in creating the garden
space.
After placing all the bricks, I
pushed sand into the cracks and behind to help secure them in place.
I tamped down the sand and dirt in the planter behind the bricks to
help keep them from moving as well. The result is a nice added
feature to the garden which gives character and color to the area.
Proceed to Garden Project Stage 4 - Selecting
Landscape Plants >>
|